Slide thumbnail

Kit Ultimate

$284.05
Tax inc.
ZT066

  • Kit Ultimate

Quantity :

Summary

  • Kit Ultimate
    Kit Ultimate

    1 Guide de Gleason pour vous laisser guider durant l'affûtage

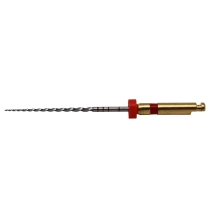
    1 pierre diamantée pour le petit entretien

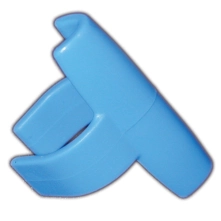
    1 Ping Ring pour tester vos lames

    Presentation

    Drill, Squeeze & Remove !

    Forget those outdated complicated devices, and stop wasting your precious time on last centuries techniques with their random results and uncomfortable surgery.

    Use the only technically correct procedure that can remove a post without risk to the root, quickly, reliably and painlessly. WamX.

    Using a simple mechanical principle, WAM'X allows you to remove a post in 5 to 10 minutes. The Prongs' action generates several technically correct forces between the core and the occlusal side of the root, which induces no pain or risk for your patient.
    WAM'X will provide you spectacular results, even on mobile teeth.

    WAM'X is painless and risk-free.

    Thanks to the free rotation of the prongs, WAM'X automatically self-aligns to the path of least resistance. This allows the post to move freely as it releases - exactly the same way it went in. The root is always gently held in compression, never tension, and pressures on the root are extremely low, which minimizes risks of fracture for the root.

    In certain situations (i.e. apical infection on posterior lingual root,...) surgery is nearly impossible or unpredictable. Thanks to its compact shape, WAM'X allows you to reach any part of the denture and to remove any cast post or richmond crown in order to make a root canal re-treatment. Thanks WamX!

    How it works

    NEW - SuperQuick prongs process

    Reccently developped by Dr Cauris Couvrechel (Paris), the Super Quick prongs allow you now to remove a large number of cast post in less than a minute. Thanks to hteir modified shape and a smart process, the preparation is greatly eased and fastened. Moreover, it avoids to drill against the dentin which allows essential tissue savings and preserve the ferrule effect.

    Post & Core case

    Create a groove on the mesial and distal sides of the core. Unlike the orginal process, this new process doesn't require to drill at the junction between the core and the root.

    Try successively the different sizes of prongs in the order to select the smallest one that matches the U-shaped groove around the core.
     Select now the smalllest prong able to slide around the core. This prong will ideally slide along the core until it hits the margin.
    Once selected, insert the prongs into the forceps.

    Apply ultrasonic waves at full power, for 1 or 2 minutes on all sides of the post,alternatively with and without spray.
    Place the prongs mounted on the forceps as shown on this picture.
    Squeeze the forceps. When the larger prong hits the margin, the smaller one starts to lift the core along the axis of the pos

    Richmond crown case

    Using a drill or a disk, remove the distal and mesial sides of the crown.

    Create a groove on the mesial and distal sides of the core. Unlike the orginal process, this new process doesn't require to drill at the junction between the core and the root.

    Try successively the different sizes of prongs in the order to select the smallest one that matches the U-shaped groove around the core.
    Select now the smalllest prong able to slide around the core. This prong will ideally slide along the core until it hits the margin.
    Once selected, insert the prongs into the forceps.

    Apply ultrasonic waves at full power, for 1 or 2 minutes on all sides of the post,alternatively with and without spray.
    Place the prongs mounted on the forceps as shown on this picture.
    Squeeze the forceps. When the larger prong hits the margin, the smaller one starts to lift the core along the axis of the post.

    Universal prongs process

    Make several preliminary X-rays in order to locate approximately the interface between the core and the occlusal of the root.

    Create a "U" shaped space around the post in order to locate the post. Then, slowly eliminate the
    material remaining between this space and the occlusal side of the root.

    Apply ultrasonic waves at full power, for 1 or 2 minutes on all sides of the post,alternatively with and without spray.

    Choose the appropriate sizes of prongs and insert them as shown on the animation, one against the other.

    Keep the Wam'X plier loose (closed) and introduce the prongs gently, as far as possible between the root and the core.

    Squeeze the grips while firmly pressing your finger on the top of the prosthesis. This prevents it from springing out when the bond is broken. The separation of the prongs will remove the post.

    Dépose des reconstitutions corono-radiculaires : protocoles simplifiés

    C. Perez & C. Couvrechel, Les Entretiens d’Odontologie Stomatologie, 2017

    Résumé

    Face à un échec endodontique, le retraitement orthograde est souvent la solution de première intention. Ceci implique la dépose des restaurations coronaires et corono-radiculaires.
    Durant cette étape, la conservation maximale des structures dentaires saines doit être un objectif aussi important que le succès endodontique. Après l’analyse de la situation clinique, l’association en trois temps des techniques de dépose par vibration et par traction permet le démontage des reconstitutions corono-radiculaires en toute sécurité. Ce protocole inclut un nouvel instrument qui concilie économie tissulaire, sécurité et réversibilité. L’inlay-core est préalablement préparé a minima par 2 encoches proximales.
    La Wam’X SuperQuick®, agit par un mouvement de traction axial sur la restauration corono-radiculaire provoquant la rupture du materiau d’assemblage. La conception de la pince permet de donner une certaine liberté d’axe de traction afin d’éviter la fracture de la structure dentaire.

    Mots clés : inlay-core, effet férule, dépose, adhésion

    Article complet ici

    Universal prongs

    SuperQuick prongs

    Is it possible to remove post cores aswell as richmond crowns with WAM'X® ?

    Yes of course. The principle is exactly the same for the two situations. I case of a post core, you can even remove the post core and the crown at the same time, without removing the crown before. It's like removing a richmond crown.

    Is it possible to remove post cores with dowel?

    Yes. In this situation, you will just have to drill first to split the core in 2 or 3 parts (as many parts as posts) , In many cases, you could be surprised to see the dowel removed by the drill vibrations.

    Is it possible to re use the post after its removal?

    You should only be able to use it temporarilly because the important drilling in the core. You just have to fill the holes with composite.

    But don't forget that usually, when you decide to remove a post, the situation is generally uncomfortable: You only have a few choices:

    * Post removal and endodontic treatment
    * Apical surgery + retro obturation.
    * Root extraction

    Is it possible to remove a post if it is linked to other prosthetic elements?

    Yes. The post and the rest of the prosthesis must be removed separately. Therefore, it is necessary to separate the post from the bridge before starting to remove it.

    "The WAM (WAMKey and WAM'X) products are becoming indispensable in daily dental practice. Once you get familiar with these instruments after a few introductory sessions first, you will then never be able to do without. They are manufactured to high standards with a state-of-the-art design and a superior after-sales service. We can certainly proceed differently (although in certain cases, the WAM'X is the only solution) but doing so is complicated, extremely complicated!"

    Dr Alain GUYOBON - Saint Cyr l'Ecole (FRANCE) 2008.

    "As an endodontist, I never though removing a cast post could be that easy and so predictable."

    Clara STRÖM DDS (Sweden)

    "Far easier than any other solution surprisingly efficient. From my experience, a real must have."

    Peter D. MILLER DDS (USA)

    "There aren't that many solutions available for that purpose. And some of them are not that efficient. But that one REALLY WORKS!"

    Irina BOVKA DDS (Germany)

    La différence PARADISE DENTAL TECHNOLOGIES

    Et l'affûtage devint facile...

    Tous les produits de Paradise Dental Technologies ont pour but d’améliorer votre confort, grâce à une ergonomie sans cesse repensée, une meilleure conception des lames et des portées et une durabilité sans cesse augmentée grâce aux matériaux et processus métallurgiques brevetés :

    • Tous les produits PDT sont fabriqués à la mains par des professionnels.
    • 100% fabriqué aux Etats-Unis et en Allemagne
    • Le manche ergonomique de 13 grammes été conçu avec l’aide de chirurgiens orthopédiques, des thérapistes physiques et des chirurgiens-dentaires : il réduit la fatigue, les risques de troubles musculo-squelettiques tout en amplifiant les sensations tactiles grâce à son revêtement spécial.
    • Acier breveté renforcé pour une longévité exceptionnelle

    Dans ce même esprit, nous avons voulu transformer ce moment délicat qu’est l’affûtage en un acte simple, rapide et précis. Fini le gaspillage !

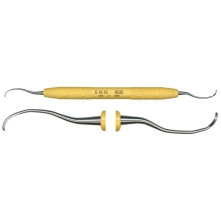
    Le kit complet est composé d'un guide d'affûtage, de deux pierres en céramique, et d'un anneau testeur. Le guide d'affûtage comporte deux biseaux dotés chacun d'une angulation spécifique afin d'épouser parfaitement le tranchant de vos instruments.
    Les pierres en céramiques sont particulières car elles ne nécessitent ni d'eau, ni d'huile. Leur entretien est simple. Passez un coup de chiffon pour nettoyer les particules d'acier après utilisation puis passez les à la stérilisation afin d'enlever les derniers résidus.

    Vous trouverez également deux types de pierres :

    • La pierre blanche, dite diamantée, qui servira à l'entretien des lames en bon état initial.
    • La pierre en céramique, dite de transformation, servira à réparer vos lames émoussés et délaissées au fond des tiroirs.

    Pour finir, vous trouverez un anneau bleu afin de tester vos lames : préservez vos mains ! Utilisez l'anneau pour contrôler le tranchant de vos lames : si vos instruments sont bien affûtés, ils devraient accrocher la bague.

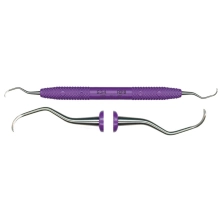
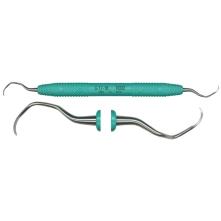
    Affûtage d'une Montana Jack avec un guide de Gleason

    Affûtage d'une Gracey avec un guide de Gleason

    Affûtage d'une O'Hehir avec un guide de Gleason

    Protocole

    Placez la pierre d'affûtage sur le bout des doigts, (paume de la main vers le ciel).

    Appuyez votre pouce sur la face supérieure du guide afin de stabiliser l'ensemble. Les droitiers préfèrent généralement utiliser leur main gauche pour maintenir le guide et leur main droite pour tenir l'instrument.

    Saisissez l'instrument choisi (gracey, curette universelle ou détartreur).
    Repérez la partie tranchante de ce dernier, puis placez le dos de la lame en butée à la jonction du biseau du guide et de la pierre d'affûtage. Vérifier que l'installation soit stable.

    Ramenez le manche de votre instrument à la verticale tout en le maintenant en butée contre la jonction du biseau du guide et de la pierre d'affûtage. Nous appellerons cette position "stop".

    Tout en maintenant la lame en position "stop", abaissez le manche de façon à ce que la tige vienne s'appuyer sur l'arête de la barre longitudinale du guide. Nous appellerons désormais cette position "repos".

    Tout en gardant cette position de "repos", exercez un mouvement de va-et-vient le long du guide pour commencer à affûter votre instrument.

    Pour affûter l'extrémité arrondie de l'instrument, effectuer le même mouvement tout en effectuant des mouvements en pivotant sur le coude de la lame de façon à travailler sur tout l'arc tranchant de la lame.
    NB :
    • Le kit "ultimate edge" est fourni avec un anneau testeur qui vous permet de contrôler le tranchant de vos instruments. S'ils ont été correctement affûté, la partie tranchante accrochera l'anneau.
    • Pour un entretien régulier de vos lames, utilisez la pierre diamantée
    • Pour une remise en forme de lames plus endommagées, utilisez la pierre de transformation "gros grain".

    Legal notice:
    The applicable conditions, prices, intended use, features and regulatory information of the devices are specified on each product page of the website wamkey.com.
    Medical devices intended exclusively for dental healthcare professionals; not reimbursed by health insurance organizations under the LPP (List of Reimbursable Products and Services).
    Please read the instructions for use carefully on the IFU or labeling before any use.

    Detailed information

    BrandParadise Dental Technologies
    ReferenceZT066
    Maintenanceautoclavable 135°C/275°F
    France exclusivityWAM